
This quick and easy guide runs through how to install presets into the Korg Volca FM hardware synthesizer. In this tutorial, we’ll be using our ‘Shrines’ preset pack to demonstrate the steps.
GETTING STARTED
We’ll be using a free program called ‘Dexed’ to install presets into the Volca FM. You can also use this program to create your own presets and use it as a VST synth plugin. Volca FM preset files are in Sysex format, so any other sysex librarian will work if you have another preference. We like Dexed as it allows you to play the presets on your computer as well. You can download it here:
You’ll need a MIDI cable and a MIDI interface. Connect your MIDI interface into your computer, then plug the MIDI cable into the MIDI OUT port and connect the other end into the MIDI IN on the Volca FM. Now everything is connected, ensure DEXED is installed and open it.
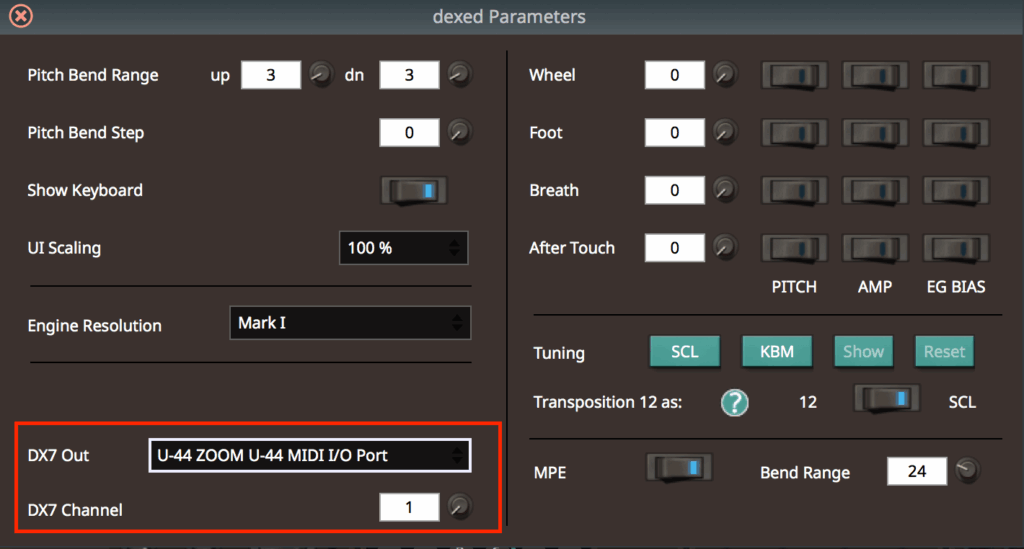
Click ‘Parm’ on the bottom left of the Dexed window, then click on ‘DX7 Out’ to select the MIDI output connected to the Volca and use ‘DX7 Channel’ to select the MIDI output connected to your Volca:
If you need to change the Volca FM MIDI channel, follow these instructions:
1. While holding down the MEMORY button ,turn the Volca FM on.
2. Keyboard buttons 1 to 16 correspond to the MIDI channels 1 to 16. Press the button that corresponds to the desired channel, and the LED below the keyboard button will light up.
3. Ensure the same channel is selected in the DX7 channel in Dexed.
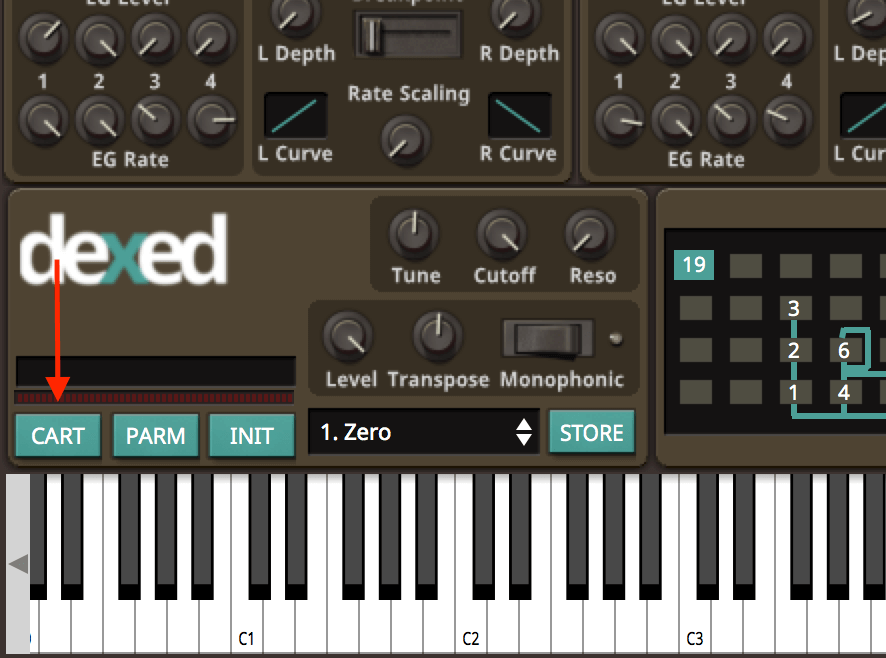
Close the ‘Parm’ window in Dexed and click ‘Cart’ bottom left of the window to open up the cartridges page:
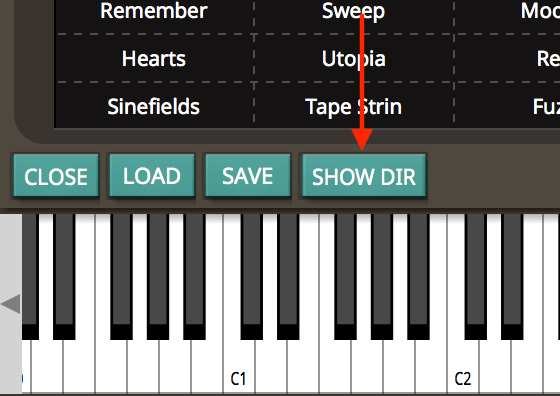
Click ‘Show Directory’ (bottom left of the window, above the keyboard).
This will open an explorer window. Copy the file Shrines_SG.syx file in the ‘Shrines’ folder (or your own .syx file). Now paste it into the window Dexed opened, ensuring it’s placed into the ‘Cartridges’ folder.
Navigate back to Dexed, right click any file in the browser window and click ‘Refresh’ to refresh the list. The ‘Shrines’ cartridge will then appear. If you don’t have a file to click, just reopen the application and click ‘Show Dir’ again.
Now right-click the Shrines_SG.syx file and select ‘Send sysex cartridge to DX7’. Job done.
If you encounter any issues installing SoundGhost presets, you can contact us via our Contact form. For any issues with third party packs or your synth, please contact the vendor your purchased them from. ?
This web site is not endorsed by, directly affiliated with, maintained, authorized, or sponsored by any companies mentioned here. All product and company names are the registered trademarks of their original owners. The use of any trade name, trademark, emblems and images is for identification and reference purposes only and does not imply any association with the trademark holder of their product brand.